What Is ParaView
From the ParaView website:
ParaView is an open-source, multi-platform data analysis and visualization application. ParaView users can quickly build visualizations to analyze their data using qualitative and quantitative techniques. The data exploration can be done interactively in 3D or programmatically using ParaView’s batch processing capabilities.
ParaView was developed to analyze extremely large datasets using distributed memory computing resources. It can be run on supercomputers to analyze datasets of petascale size as well as on laptops for smaller data, has become an integral tool in many national laboratories, universities and industry, and has won several awards related to high performance computation.
ParaView for Computer Aided Engineering (CAE)
ParaView is particularly useful for CAE applications, as an open-source post-processing package that requires no license fees and is capable of interfacing with simulation results from both commercial and open-source solvers.
The combination of scriptability, extensibility and its open-source license makes it an excellent platform for automating CAE analysis workflows.
Installation
In this guide, we will be installing ParaView using EGL for the purpose of rendering visualizations to an off-screen buffer. This will allow users to leverage the power of hardware-accelerated rendering without the need for a window system or display device.
This build of ParaView can be used to execute data visualization processes in the background on a workstation, or on an HPC system as a batch submission job, where the host has an available GPU.
Disclaimer
This installation process is heavily dependent on the target machine, its configuration and the date at which the install process takes place. For this reason, the instructions below cannot be guaranteed to produce a correct result. You may be required to modify the steps to suit your particular needs.
It is advised that anyone performing these steps have some experience in Linux system administration.
Requirements
To use this build, users will need a graphics card that supports OpenGL rendering through EGL.
This guide will use an NVIDIA card as an example. Any modern NVIDIA card with an up-to-date driver should work.
Dependencies
Basic
Most system dependencies can be installed with Ubuntu’s system package manager.
In your terminal, run:
sudo apt install autoconf build-essential libtool gfortran
CMake
The ParaView installation process requires a CMake version newer than 3.6.1. For this, we’ll install CMake from source.
Below is a simple example for installing to /opt. You may wish to change
these steps to conform to your administration policies.
cd /opt
sudo wget https://cmake.org/files/v3.10/cmake-3.10.1-Linux-x86_64.sh
sudo chmod +x cmake-3.10.1-Linux-x86_64.sh
sudo ./cmake-3.10.1-Linux-x86_64.sh
Scroll down until you are prompted to accept or reject the license agreement.
Press y to accept.
Next, you will be asked where you would like to install CMake. Press y.
Then, link the executables to /usr/local/bin by executing the following in
your terminal:
sudo ln -s /opt/cmake-3.10.1-Linux-x86_64/bin/* /usr/local/bin
Finally, check that cmake can be executed:
cmake --version
You should see “cmake version 3.10.1” printed to the terminal.
NVIDIA Drivers
Ensure that your graphics card driver is properly installed. If your driver is installed, you may skip this step.
For NVIDIA cards that support the latest drivers, follow the steps below in your terminal.
First, remove any existing NVIDIA drivers:
sudo apt-get purge nvidia*
Then, add the graphics driver PPA. Note that this is a community-provided package. If you administration policies don’t allow PPAs, you can install the drivers provided directly by NVIDIA.
sudo add-apt-repository ppa:graphics-drivers
sudo apt-get update
Then, install the NVIDIA drivers. This example uses nvidia-384, but you may
use nvidia-current for the latest driver.
sudo apt-get install nvidia-384
The driver package should automatically take care of blacklisting the default nouveau drivers.
Reboot your computer and check the installation by executing:
lsmod | grep nvidia
Graphics Libraries and Headers
In addition to the graphics card driver, you’ll need to install the development headers as well. If you followed the steps above (or similar) for driver installation, this will look like:
sudo apt-get install nvidia-384-dev
Additionally, install the X11 headers:
sudo apt-get install libx11-dev
Finally, because extensions vary from platform to platform and driver to
driver, OpenGL developers can’t expect interfaces for all extensions to be
defined in the standard gl.h, glx.h, and wgl.h header files supplied with
the OS / graphics drivers. So we use the headers provided by NVIDIA.
To do so, you’ll need to link the GL headers provided by NVIDIA to the
header search path, or explicitly identify them during the build process.
To link them, execute the following:
cd /usr/include
sudo ln -s nvidia-384/GL .
EGL
Next, you’ll need to obtain the EGL headers directly from Khronos.
cd /usr/include
sudo mkdir EGL
cd EGL
sudo wget https://www.khronos.org/registry/egl/api/EGL/egl.h
sudo wget https://www.khronos.org/registry/egl/api/EGL/eglext.h
sudo wget https://www.khronos.org/registry/egl/api/EGL/eglplatform.h

cd /usr/include
sudo mkdir KHR
cd KHR
sudo wget https://www.khronos.org/registry/egl/api/KHR/khrplatform.h
Installing ParaView
The instructions below provide sensible defaults for installing ParaView 5.4.1 to your system. You may need to adjust some settings to suit your needs.
We will be using the “ParaView Superbuild” approach for the install. You can read more about it here.
First, collect and configure the required source code. In a terminal, execute:
cd /opt
sudo git clone --recursive https://gitlab.kitware.com/paraview/paraview-superbuild.git
cd paraview-superbuild
sudo git checkout v5.4.1
sudo git submodule update
Then, make a build directory for the ParaView installation:
sudo mkdir -p /opt/paraview-5.4.1
cd /opt/paraview-5.4.1
Next, we’ll configure the CMake settings:
sudo cmake ../paraview-superbuild/
sudo ccmake .
Then, use the arrow keys and the enter button to change the following settings from their defaults:
CMAKE_INSTALL_PREFIX=/opt/paraview-5.4.1
ENABLE_egl=ON
ENABLE_ffmpeg=ON
ENABLE_fontconfig=ON
ENABLE_freetype=ON
ENABLE_matplotlib=ON
ENABLE_mpi=ON
ENABLE_numpy=ON
ENABLE_ospray=ON
ENABLE_png=ON
ENABLE_python=ON
ENABLE_pythonsetuptools=ON
ENABLE_scipy=ON
Then, hit c to attempt to save your selection.
You are likly to then get an error message saying CMake couldn’t find EGL. If
so, hit e to close the error message. Then, at the top of the menu, make the
following changes:
EGL_INCLUDE_DIR=/usr/include
EGL_LIBRARY=/usr/lib/nvidia-384/libEGL.so
EGL_gldispatch_LIBRARY=/usr/lib/nvidia-384/libGLdispatch.so.0
EGL_opengl_LIBRARY=/usr/lib/nvidia-384/libOpenGL.so
Then, hit c to save your configuration and then q to exit.
Next, in your terminal, build and install ParaView:
sudo cmake .
sudo make -j 4 && sudo make install
Testing
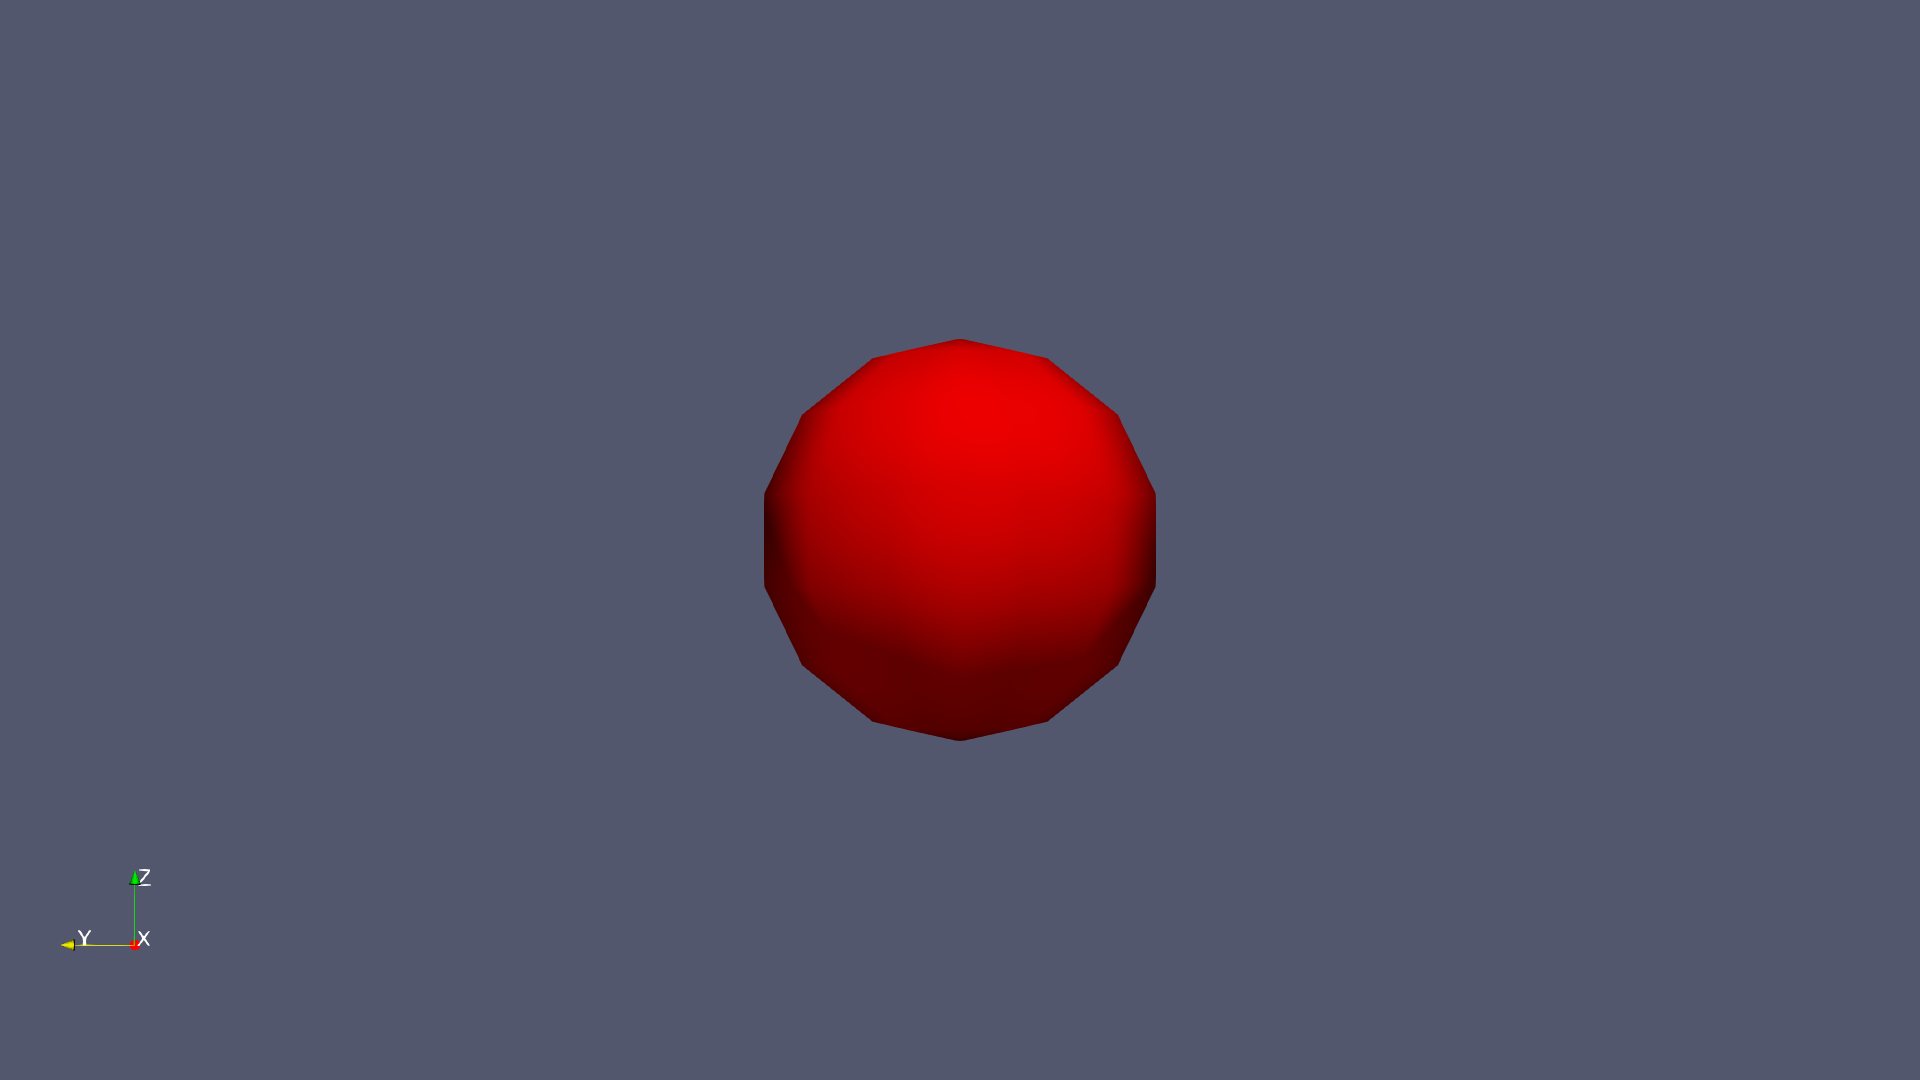
To test your ParaView installation, you can use the following Python script.
import paraview.simple


def main():
    render_view = paraview.simple.GetActiveViewOrCreate('RenderView')
    render_view.ViewSize = [1920, 1080]

    sphere = paraview.simple.Sphere()
    sphere_display = paraview.simple.Show(sphere, render_view)
    sphere_display.DiffuseColor = [1.0, 0.0, 0.0]

    render_view.CameraPosition = [-5.0, 0.0, 0.0]
    render_view.CameraFocalPoint = [0.0, 0.0, 0.0]
    render_view.CameraViewUp = [0.0, 0.0, 1.0]
    render_view.CameraParallelScale = 1.0

    paraview.simple.SaveScreenshot('./test.png', render_view)


if __name__ == '__main__':
    main()
To execute the script, run:
/opt/paraview-5.4.1/bin/pvbatch /path/to/script.py
The output should be a png image file called test.png that is saved to the
directory from which the script was called.
The image should look like this: