Overview
This article is intended to serve as a guide for saving screenshots from a ParaView session, both interactively from the GUI and from a Python script.
For the purposes of this article, we will be using Paraview 5.4.1.
For installation instructions, please see the guide for CPU-based rendering or GPU-based rendering.
For help running ParaView scripts, please see the batch-execution instructions.
Manual Instructions
With an open ParaView session, and a Render View you would like to save, do the following:
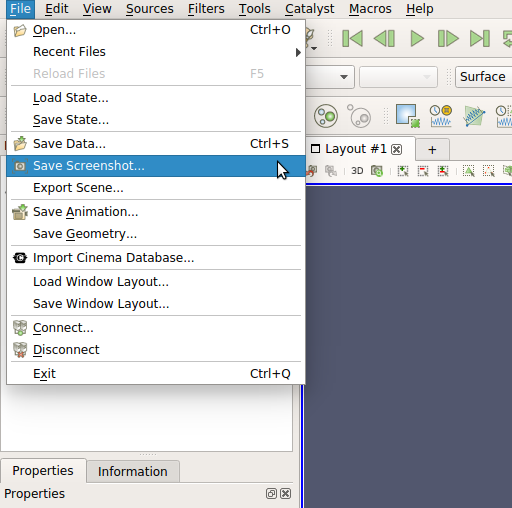
1) Select File >> Save Screenshot from the top menu.
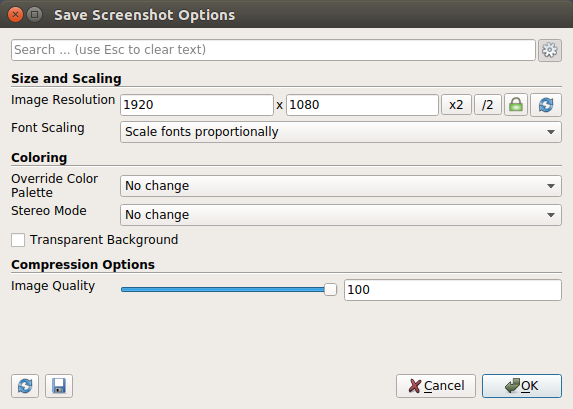
2) In the window that appears, make any screen capture adjustments that are required. This may include image resolution, background color, or image quality.
After you’ve made your selection, hit OK.
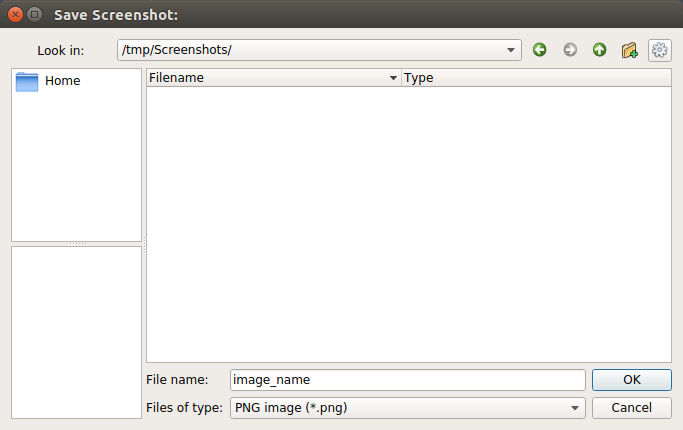
3) Finally, in the next window, navigate to the parent folder you’d like to save your image to, enter an image name in the “File name” field, and select a file type in the lower drop-down menu.
When you’re ready, hit OK and your image will be saved.
Scripted Instructions
To save a ParaView screenshot in a Python script, first import the necessary
module. The SaveScreenshot function is imported from the paraview.simple
module.
import paraview.simple
The basic Python API call for saving a screenshot looks like this:
paraview.simple.SaveScreenshot('/path/to/image.png', render_view)
Here, '/path/to/image.png' is the absolute path to the output file, or a path
relative to the directory from which the script was executed, and render_view
is the View object you would like to save.
Views can be found by name with:
render_view = paraview.simple.FindView('ViewName')
Or you can access the active view with:
render_view = paraview.simple.GetActiveView()
The default view should be called 'RenderView1'. A viewtype can be one of
many options. RenderView is the 3D window view type, but a view could be any
of ParaView’s window display types.
Image Formats
Paraview supports saving images in a number of image formats, including:
- PNG Image (
png) - JPG Image (
jpg) - TIFF Image (
tif) - BMP Image (
bmp) - PPM Image (
ppm)
To specify the output file format, simply change the file extension in the function call path argument. The valid extensions are shown in parentheses above.
Ensuring Parent Directories Exist
Before saving the image, you must ensure that the directory it will be saved to exists. Parent directories will not be created automatically.
To do so, you may use this code snippet:
import os

image_path = '/path/to/image.png'
directory = os.path.dirname(image_path)

try:
    os.makedirs(directory)
except OSError:
    if not os.path.isdir(directory):
        raise

# save the image here
Setting the Image Resolution
Image resolution can be set in one of two ways. First, you may set the resolution of the view, which will then be inherited by the screenshot:
render_view = paraview.simple.GetActiveView()
render_view.ViewSize = [1920, 1080]
Or, you can set the image resolution when the screenshot is saved:
paraview.simple.SaveScreenshot('/path/to/image.png', render_view, ImageResolution=[1920, 1080])